This is a general overview of how to create packages to put in the mail system for Delta-V (and any other forks that use the same mail system.)
It is an easy YAML tutorial, and requires no code knowledge, only a seldom amount of knowledge on how YAML works. You need to know how to set up a development environment, however, so those instructions are enclosed.
That is done by downloading a repository (e.g. Delta-V), which is covered both by the official, Space Wizards upstream documentation, and here with the alternative method listed:
Setting up the Development Environment
If you just want to get down to the basics and don't have time to read all of the upstream documentation, there's this, which you can skip if you already have such a thing set up:
Create a GitHub account
Go to https://github.com/ and create an account.
Make a fork of Delta-V
Go to Delta-V's GitHub page and, while signed in, click the "Fork" button in the upper-right.
Get .NET 8.0
.NET (aka "dotnet") is a prerequisite for working with RobustToolbox (the SS14 engine). You can first check to see if your computer already has it installed on your Windows PC by going into command prompt and typing dotnet --version.

If you don't have dotnet version 8.0 or higher, you can download it from Microsoft's page. You may need to restart your PC after installing dotnet.
Get Python 3.7 or higher
Make sure to install it into your PATH on Windows. You should get python from python.org. Versions installed from the windows store sometimes cause build issues.
Get GitHub Desktop
In order to download the repository itself, you do so by installing a software called "Git". However since Git isn't a very intuitive piece of software, you can get a third-party UI to do the same thing. The upstream documentation recommends to actually not use this,[1] but we ball and use it anyways. 😎 It is recommended to learn Git Bash instead, in my opinion.
Anyways, GitHub Desktop is the UI many Delta-V contributors use, and that's what I'll show you how to use.
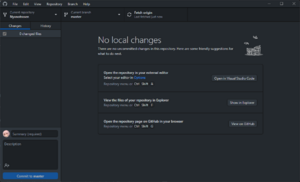
Set up GitHub Desktop
Once installed, put in your GitHub account details, select "Clone Repository from the internet" and select the fork of Delta-V you made. After it downloads the files, select that you want to "Contribute to the parent project", then go to File > Options > Appearance and select Dark Mode. Once you've done that, congratulations! You've set up your repository's master branch.

If you want to view the files, click the button that says "Show in Explorer" and it will bring up a window of File Explorer in the directory it installed to.
A final note on Github: Be sure to create a branch with a name relevant to the package you're making. If you make the PR on the master branch for your repository, GitHub will immediately close your PR. Creating a branch can be achieved by right clicking the button at the top of the Github Desktop window that says "Current Branch: Master."
Okay, now that that's done, how do I make the package?
Locate the files in your cloned repository named mailDeliveries.yml and mail.yml. If they are the correct files, they should be under DeltaV folders (unless you are editing mail for a different fork, such as Frontier Station, in which case the proper files may be in folders under their name.)
mailDeliveries.yml is important, but only comes into use later, since it is the file that holds the probabilities of the mail table, and it governs the RNG with the weights of the packages listed in it. It is inextricably tied to mail.yml and all associated files, because it refers to the packages listed in the mail yaml files.
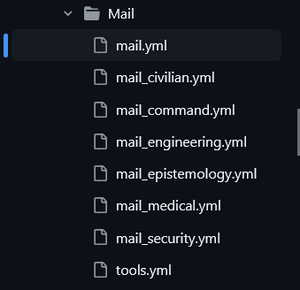
In the folder containing the mail.yml, you will notice that there is a bunch of files that end in different department names. These are for department specific packages, which can be listed in the mail table under different probabilities. For the sake of this, I'll focus on how to make a basic package everyone will get.

How to actually make a package
This is the basic structure for a mail package in YAML.
 - type: entity
   parent: BaseMail
   id: ExampleMailName
   suffix: Example mail suffix
   components:
   - type: Mail
     contents:
       - id: ExampleMailItem
This may look weird to someone who knows no YAML, and has never seen such. But here are a few notes on how to read this.
- The parent, BaseMail, creates mail in envelopes only. If you think your package won't fit in an envelope, consider making the parent BaseMailLarge. That'll pack it up into a cardboard box.
- The ID will be what you punch into the mail table. Admins will see this when they right-click the package. It should be a summary of what the package is; for reference, "MailRestraints" is the infamous bondage mail.
- The suffix will appear as the name after the package in the spawn panel, so it's not that different from the ID. Continuing to use the bondage mail as an example, it could be something like "restraints."
- You are always going to want to have the only component as - type: Mail for simple packages, and then have the contents of that mail list the ID of the items inside. Running with the theme of the bondage mail, it's listed there as this:
   contents:
   - id: Handcuffs
   - id: ClothingMaskMuzzle
   - id: ClothingEyesBlindfold
If you have trouble looking up the IDs for the item you want to have in your mail, using GitHub's search function on the repository is your best friend. Look up the name of the object in-game, and it should point to a file with it and show you the ID.
Oh, and one more thing, for more complex mail packages. We can throw probability in the mix! The sword mail is my favorite example of this.
 - type: entity
   parent: BaseMailLarge
   id: MailNFSword
   suffix: sword
   components:
   - type: Mail
     contents:
     - id: KatanaDulled
       orGroup: Sword
       prob: 0.95
     - id: ClaymoreDulled
       orGroup: Sword
       prob: 0.95
     - id: FoamCutlass
       orGroup: Sword
       prob: 0.95
     - id: Katana
       orGroup: Sword
       prob: 0.5
     - id: Claymore
       orGroup: Sword
       prob: 0.5
     - id: CaneSheathFilled
       orGroup: Sword
       prob: 0.3
     - id: Cutlass
       orGroup: Sword
       prob: 0.1
     - id: Kanabou # ah yes, swords
       orGroup: Sword
       prob: 0.1
     - id: ClothingBeltSheathFilled # Little dangerous between the reflect and the damage
       orGroup: Sword
       prob: 0.001
orGroup denotes the group of items. If you want your mail to randomly select from different groups (say, you have two items in your mail, and one is supposed to be a randomized knife and the other is a randomized cake) then it separates the randomization of those via names of groups.
prob is how often it shows up in this package and denotes the probability of getting that item. Within the sword mail, this is 0.001 for the captain's sword, and the other actually lethal swords (claymore, cutlass, katana, the cane sword, the cutlass, and the kanabou) also have similarily low probabilities while the nonlethal swords have higher ones.
Okay, now I have a package. How do I send it to all Delta-V stations and everywhere else?
Remember mailDeliveries.yml from the beginning of this page? Yeah, this is where it's relevant. This mail table is sorted by three different types of pools:
- the "everyone" pool, everyone gets this mail. These should have probabilities in the decimals, and even out. You are more likely to get a mail if it's a higher number, and this is mean to other packages being sent if you make your mail's probability like, 10, here, because now everyone's gonna get that mail.
- the "departments" specific pools, which are further down and give you job-specific mail. These are allowed to have higher probabilities by default because they are stacked against the everyone mail.
- the "jobs" specific pools, which denote only packages that that job gets.
Now, an important note about your package that you made earlier: If it's gonna be a department specific mail, be sure to put it in one of the department specific mail.ymls, e.g. "mail_civilian.yml" for service-specific packages. This is also a good rule of thumb for job-associated mail in those departments. It's good for organization if you don't have a civilian mail in the mail.yml where the packages everyone gets are.
To add your package to the everyone pool, just throw it in the list that's at the top of the file, inbetween all the stuff there, and give it a probability that you think makes sense for whatever the package is. Most of the ones in the everyone pool have decimals in-between 0 and 1, so every package gets a fair shot.
If it's department specific, throw it into the field for the department you want to get that package, and if it's job specific, same thing. Shrimple. Set the probabilities to those to something above 1 so people in that job actually get it.
Now what?
Congratulations, you have now made a working package! All you need to do is publish your branch to the remote repository (GitHub,) and create a PR on the Delta-V repository, and hopefully that will be reviewed by a maintainer and integrated into the codebase. GH Desktop will bring you through that process pretty swimmingly.
