This is a general overview of getting started with mapping in SS14.
Mapping in SS14 is done by downloading a repository (e.g. Delta-V), building the server and client on your own machine, then joining a local server that permits you to access admin-only tools, like the mapping tool, ability to view variables, fixgridatmos, etc.
Setting up the Development Environment
There exists another, more comprehensive guide on this topic, but if you just want to get down to the basics and don't have time to read all that, there's this:
Create a GitHub account
Go to https://github.com/ and create an account.
Make a fork of Delta-V
Go to Delta-V's GitHub page and, while signed in, click the "Fork" button in the upper-right.
Get .NET 7.0
.NET (aka "dotnet") is a prerequisite for working with RobustToolbox (the SS14 engine). You can first check to see if your computer already has it installed on your Windows PC by going into command prompt and typing dotnet --version.

If you don't have dotnet version 7.0 or higher, you can download it from Microsoft's page. You may need to restart your PC after installing dotnet.
Get GitHub Desktop
In order to download the repository itself, you do so by installing a software called "Git". However since Git isn't a very intuitive piece of software, you can get a third-party UI to do the same thing.
GitHub Desktop is the UI many Delta-V contributors use, and that's what I'll show you how to use.
Set up GitHub Desktop
Once installed, put in your GitHub account details, select "Clone Repository from the internet" and select the fork of Delta-V you made. After it downloads the files, select that you want to "Contribute to the parent project", then go to File > Options > Appearance and select Dark Mode. Once you've done that, congratulations! You've set up your repository's master branch.
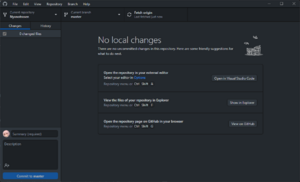
If you want to view the files, click the button that says "Show in Explorer" and it will bring up a window of File Explorer in the directory it installed to.
Server & Client
Next, in order to launch the game, you must first do two things:
- You must create a new branch (So that you are not making changes to your master branch).
- You must first build the server and client.
Making a new branch on GitHub Desktop is easy. Simply click "Branch" at the top (or the "Current branch" dropdown box just below it) and click "New Branch..." then name it. Branch names don't really matter, but you can't have two with the same name. I name my branch "test", then either delete it, or rename it to better describe my changes.
Next, you need to build your Server. Start by opening the repository's directory in File Explorer, then click the bar that lists the directory at the top of the window and type "cmd" and hit enter.
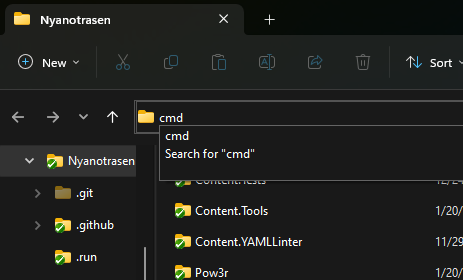
Once you do this, it will open up an instance of Command Prompt where it has the directory set to your repository.

Now, type dotnet run --project Content.Server --configuration RELEASE and wait for a moment. You will see a long list of yellow text (warnings) in the window, eventually giving way to the following text:
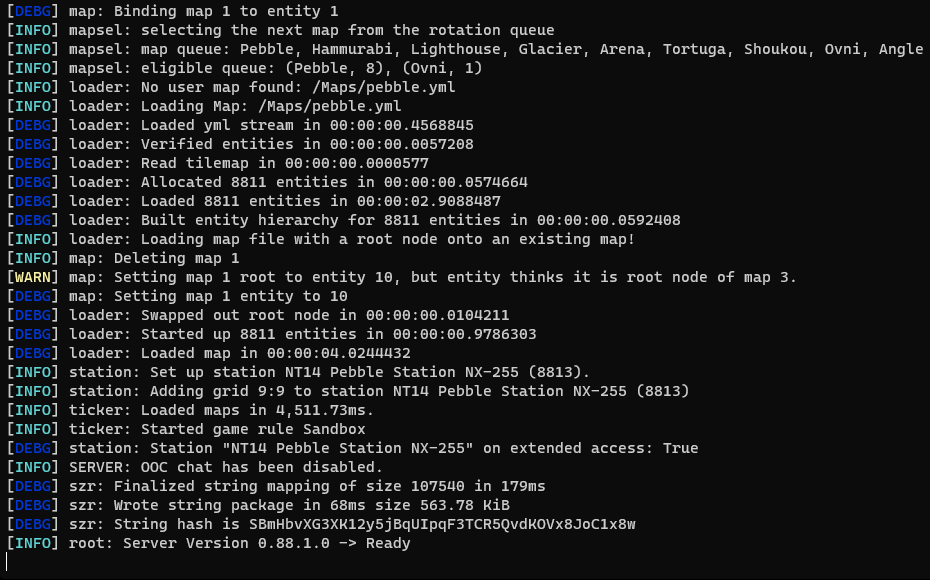
Once you've reached this point, the server is built and does not need to be built again until you make a new, updated branch. Any time in the future you want to run the server, you can use the runserver.bat file in the repository.
Next, you need to build the client. It's exactly the same process, except you run the command dotnet run --project Content.Client --configuration RELEASE. Doing this successfully will launch the SS14 client, and present you with the following screen:
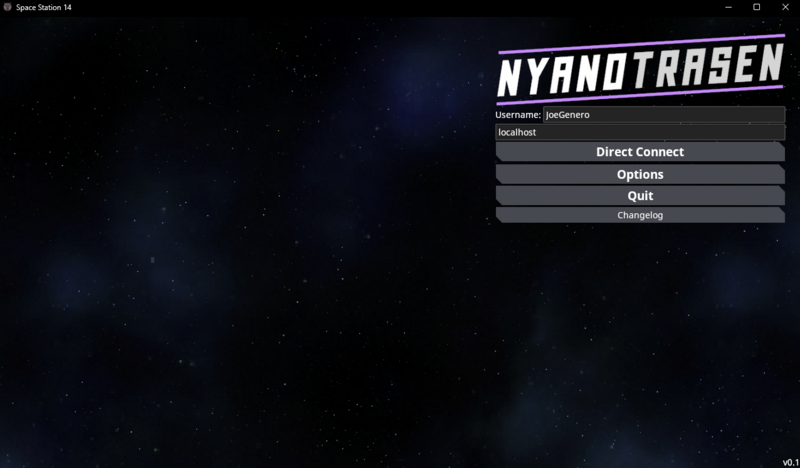
Congratulations, you can now join your own server and experiment in your own little environment! Much like with the server, you'll be able to launch the client with runclient.bat until you make a new branch with updates.
Mapping
So, to start mapping from scratch, ensure that your server and client have been built (see above section), then launch the server, then client. Upon joining the server by hitting Direct Connect, you'll enter the server lobby. You can open up the game console (by default, "~") and type startround to skip the round countdown, then join as an observer.
Once you're in as an observer, you can run this command to open up a new, empty map:
mapping 5
You will then be placed in map 5 at the coordinates 0,0. Map 5 will be completely empty, and you will notice the hotbar on the side of the screen is that of the admin ghost commands. If you were to hit the "Show Debug Monitors" key (by default "F3"), it will show you in the upper-left that you are on "Map=5, X=0.00, Y=0.00", and for future reference, this is how you find the GridUid of the grid you are currently on top of. The next coordinate to run is:
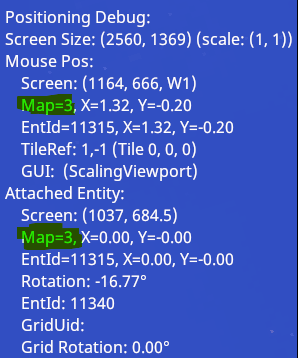
mappingclientsidesetup
This command does a couple things, firstly, it does some basic sandbox changes like toggling lights, subfloors, spawns, etc; but it also changes the hotbar's contents into placeable tiles and entities (although, it does not contain everything necessary to make a map).
After you've done this, simply press "8" and you will start placing plating, the most basic of space station floors. You can left click once and it will place the selected tile, or you can drag the mouse and it will place them in a series. You can also hold left ctrl and left click once, then move your mouse and left click to cover tile in a rectangle.
However, there is an important thing to keep in mind when starting from zero. It is the fact that you must place one tile, then build off of it gradually. An important thing to do every so often when starting is to run the following command every so often:
lsgrid
This command will list to you every grid that is on every active MapID. Since we are working on Map 5, there should only be one grid on Map 5. The reasoning being that, if the station is comprised of more than one grid, they will at some point (maybe immediately) drift away from the station and, in layman's terms, mess everything up.
Tile Placement
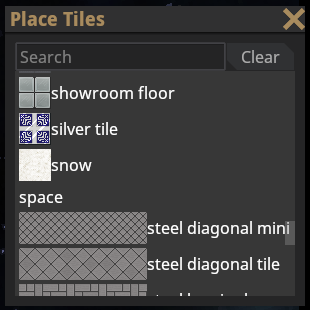
One of the two menus you'll pretty much have open always is the Tile Placement panel. It is accessed by the Sandbox Panel (by default, "B") or by pressing the corresponding key (by default, "F6").
It's a very simple panel, simply scroll through and find the tile you want.
If you need to remove tile that is placed, you do so by placing the tile "space".
Entity Placement
The next of the two menus that you'll have open is the Entity Spawn Panel, and it is also accessed by either the Sandbox Panel or by its respective key (by default, "F5").
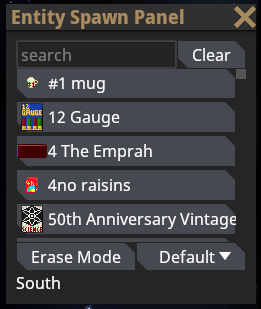
The Entity Spawn Panel contains every entity present in the server's files (in this case, your local repository). You can search for specific things by using the search bar, and erase any placed entities by toggling Erase Mode and left clicking things. Note that you can also delete things en masse by holding left ctrl and left clicking once, then simply move your mouse to cover the area of entities you want to delete. This technique can save you time, however, be advised that this will delete every entity on every tile that is covered, including things under tile, so it should be used for large removals only. The dropdown menu to the right of "Erase Mode" is in regards to placement. There are many options you can experiment with, but for the most part, the following are good to consider:
- Default - Self-Explanatory, places entities how they're (usually) intended to be placed. Things like tables will snap to a grid, and smaller, handheld things will be placed freely.
- PlaceFree - Will always place things freely, unless they are something that must be gridlocked (like walls or tables). Very useful for the irregular placement of things like folding chairs.
- SnapgridCenter - The inverse of PlaceFree, will align and center any placed entity. Useful for placing things like rollerbeds.
| Guides Library | |
|---|---|
| The Basics | Getting Started · Server Rules · Interactions · Roleplay · Game Modes · Combat · Maps |
| Command | Standard Operating Procedure · Alert Procedure · Space Law · Company Policy · Shipyard · High-Risk Items |
| Security | Security Officer · Alert Procedure · Space Law · Company Policy · Forensics |
| Engineering | Construction · Power · Atmospheric Science · Hacking · Pipes and vents · Gases · Reverse Engineering · Setting up the mix chamber |
| Epistemics | Research and Development · Xenoarcheology · Anomalous Research · Glimmer · Psionics · Golemancy · The Oracle · Robotics |
| Medical | Medical · Chemistry · Cryogenic Pods |
| Service | Cooking · Drinks · Hydroponics · Supply Crates |
| Antagonists | Guide to Traitor · Syndicate Items · High-Risk Items |
| Miscellaneous | Fauna · Playable Species · Radio · Singularity · Terminology · Weapons · Paperwork · Traits · Admin commands · Administrators |
| Contribution | Development · Mapping · Spriting · Wiki Contribution · Wikicode |